Elden Ring veterans will know just how secret some of theElden Ring boss locationsare in From Software’s gargantuanRPG.
To help you keep track of all those boss locations, we’ve put together two maps below.
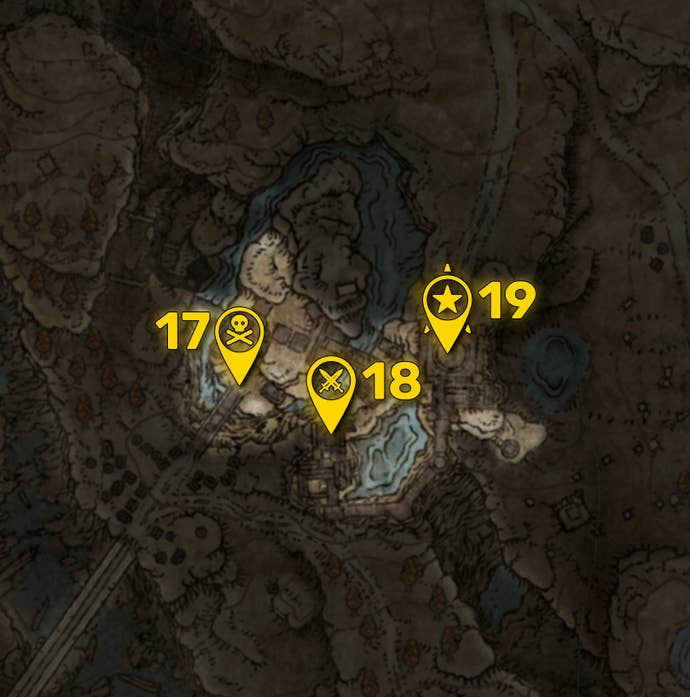
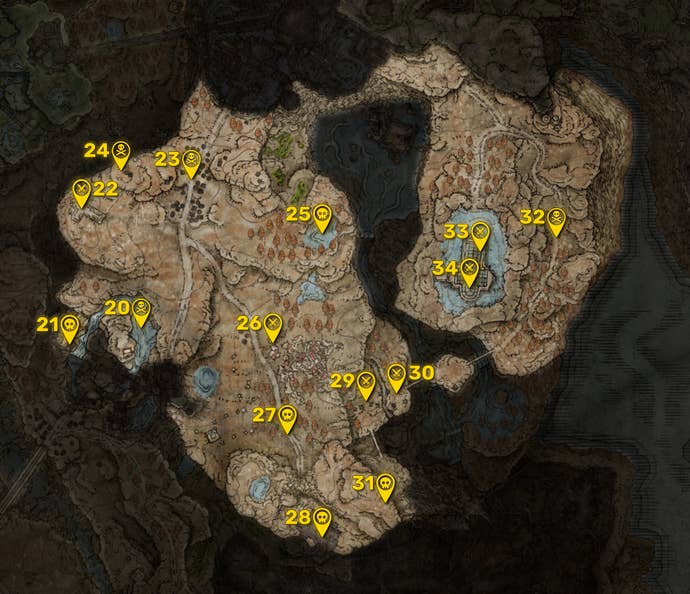
Spoiler-free DLC boss locations map:
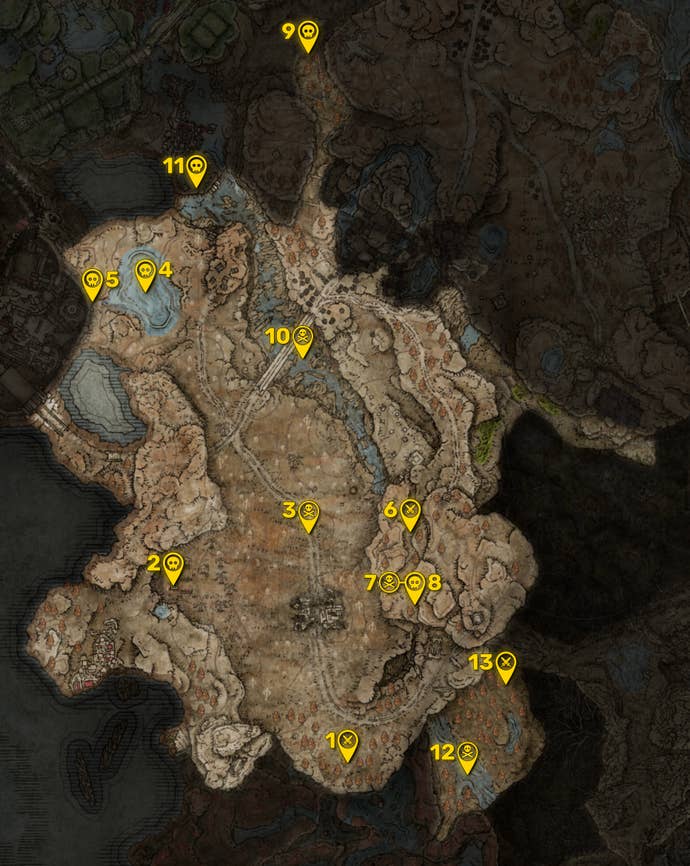
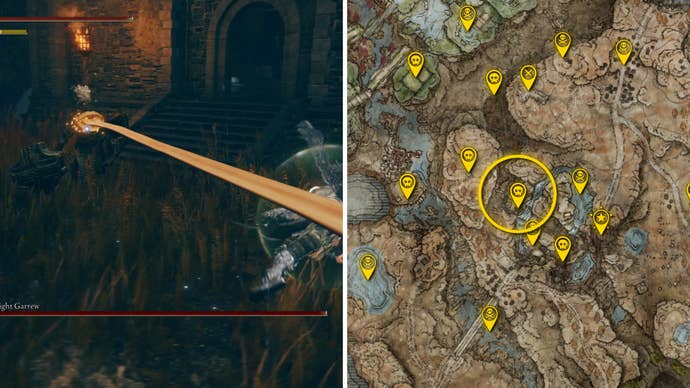
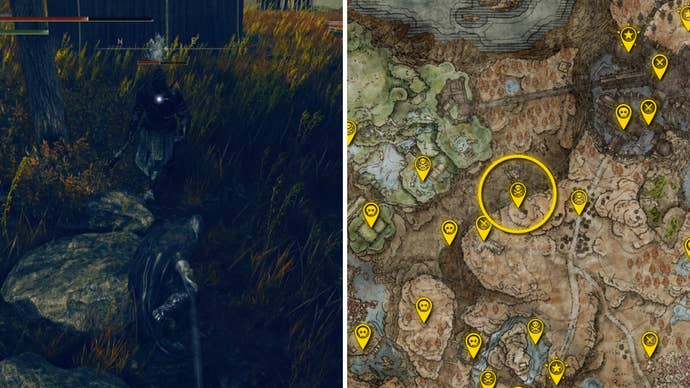
Full DLC boss locations map (Spoilers!
Here is the list of all 83 Elden Ring DLC bosses, divided by region.
Technically, you only need to defeat four bosses to beat the entire Elden Ring DLC.
They are:Messmer, Romina, Leda (and gang), and Radahn.

He wears no armour, so takes a truckload of damage.
Just don’t expect to stagger him easily, as he has pretty high poise.
Furnace Golem #1
Furnace Golems are a test of patience, in most cases.

Read more in our guide onhow to beat Furnace Golems.
Stay on horseback and slash patiently at its legs until it dies.
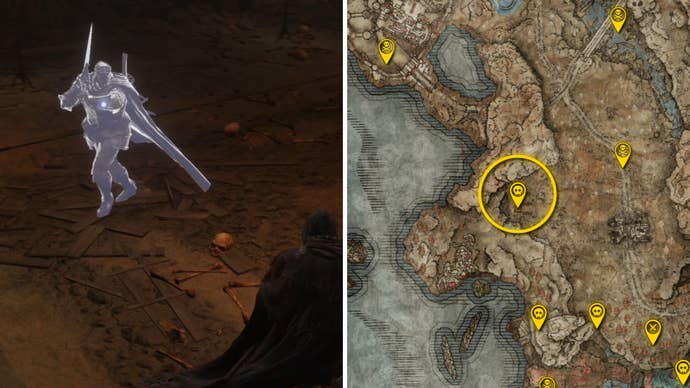
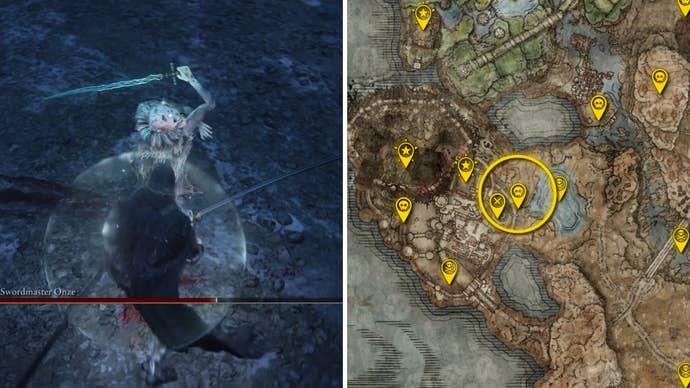
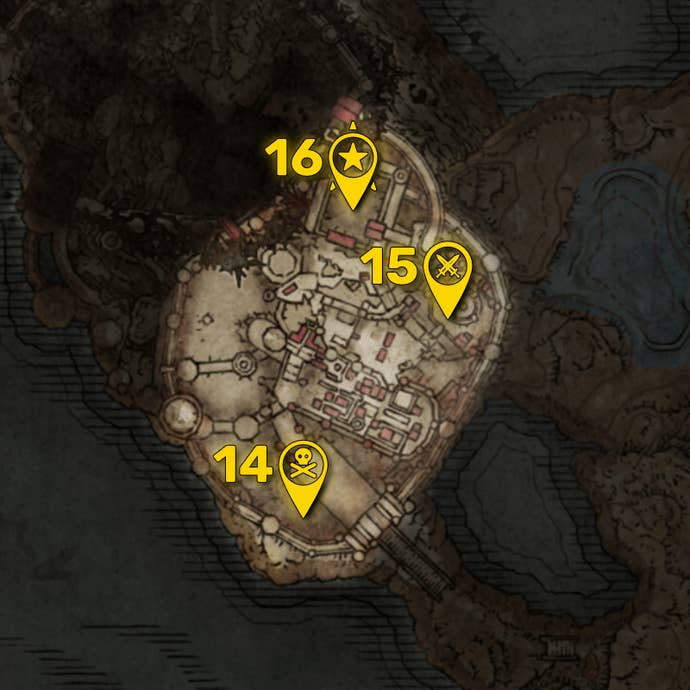
Demi-Human Swordmaster Onze
Demi-Human Swordmaster Onze can be found at the end of the Belurat Gaol dungeon.
If you give him space, though, he’ll control the tempo with his teleporting combo attacks.
Again, not too hard to avoid.
Watch out for its sudden leap attacks, which seek to close distance when you least expect it.

Otherwise, I’d treat this as a Runebear fight.
Ulcerated Tree Spirit #2
Remember theUlcerated Tree Spiritfrom base Elden Ring?
Everyone’s favourite camera-destroyer?
Well, it’s back.
Sounds hideous, but really it’s not that big a deal.
At this point, killing Tree Spirits should be second-nature.

This one is located in the garden of Belurat, just beyond the Small Private AltarSite Of Grace.
Divine Beast Dancing Lion
Ah, your first Remembrance boss.
This boss is constantly moving, which doesn’t necessarily mean it’s constantly attacking.
Learn when it’s safe to attack and heal, and the fight goes much easier.
Watch out for its area-of-effect attack when it plunges its sword into the ground.
It’s tougher to avoid than it looks.
I would advise making sure the teleporting nobles just before him are already dealt with, however.
She provides quite the challenge with her hard-to-read attack animations, long reach, and powerful combos.
Otherwise, it’s pretty much game over immediately.
It’s… it’s very weird.
He’s pretty much exactly the same here as he was in Belurat.
Furnace Golem #3
Oh look, it’s another Furnace Golem.

Yes, they’re used quite a lot in Shadow Of The Erdtree.
Really you should be thankful!
This one is found in the middle of a Messmer Soldier camp, but I wouldn’t worry.

Just bait the Furnace Golem into unleashing a few area-of-effect attacks and the Soldiers will die very quickly.
They’re back, in a hot red variety.
Not easy, but not exceptionally tough by DLC standards, either.

Or rather, bow to.
Perform the “May The Best Win” Gesture in front of him and he’ll fight you one-on-one.
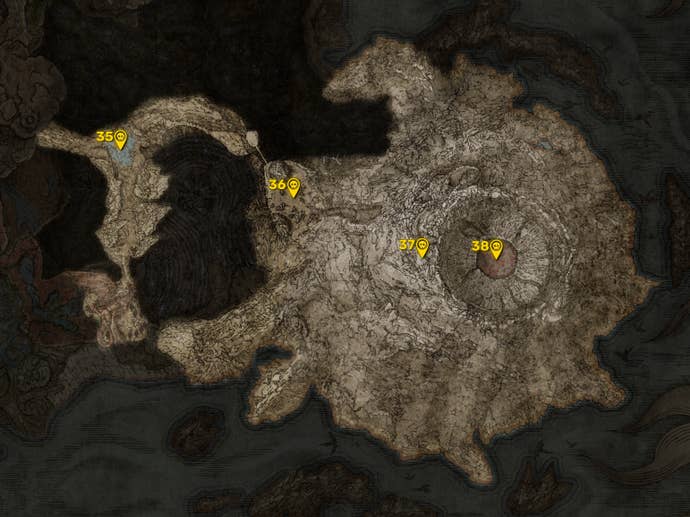
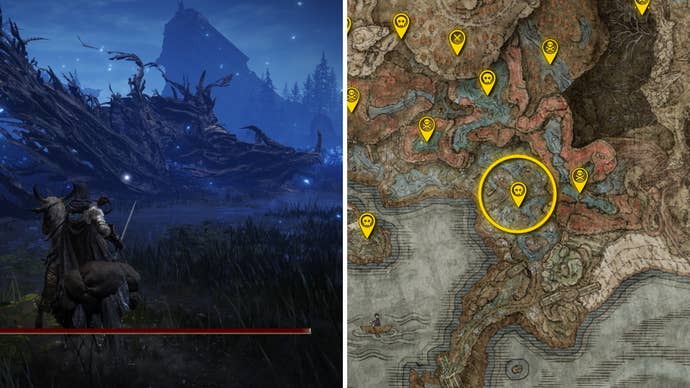
Ghostflame Dragon
Now this is quite a spectacle.

I made use of theWing StanceSkill onMiladyto exit the distance quickly, to great effect.
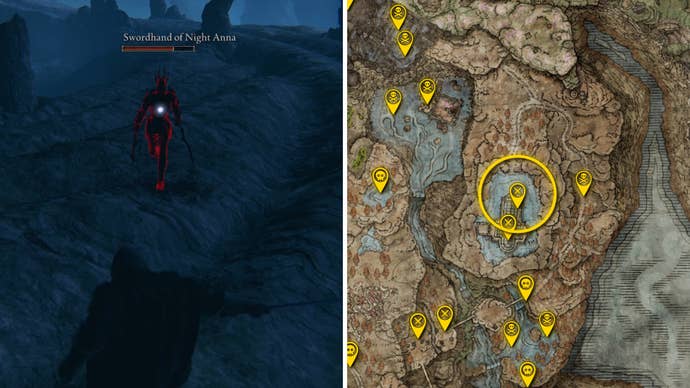
Curseblade Labirith
Curseblade Labirith is found at the end of Bonny Gaol - or is he?
There you’ll be assailed by Swordhand Of Night Anna and her Claws Of Night.
Sounds dangerous, but it really isn’t.
She’s an ordinary NPC enemy, go kill her.
These Drakes act as a bit of a cross between regular dragons and Ancient Dragons from the base game.

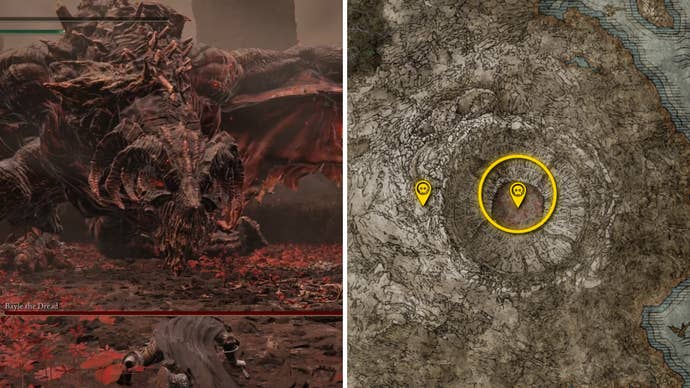
Give those lightning attacks a wide berth!
Just prepare to spend a large part of his second phase dodging attacks while he flies around the arena.
It only holds a total of 3 fairly bosses itself, among them another fearsome Ghostflame Dragon.

Thankfully, it has a habit of killing its own allies with its area-of-effect ghostflame attacks.
The Dancer herself has an interesting set of attacks which consist of very long chains of fluid strikes.
But kill him, and you’ll be rewarded with the Multilayered Ring Of Light Incantation.
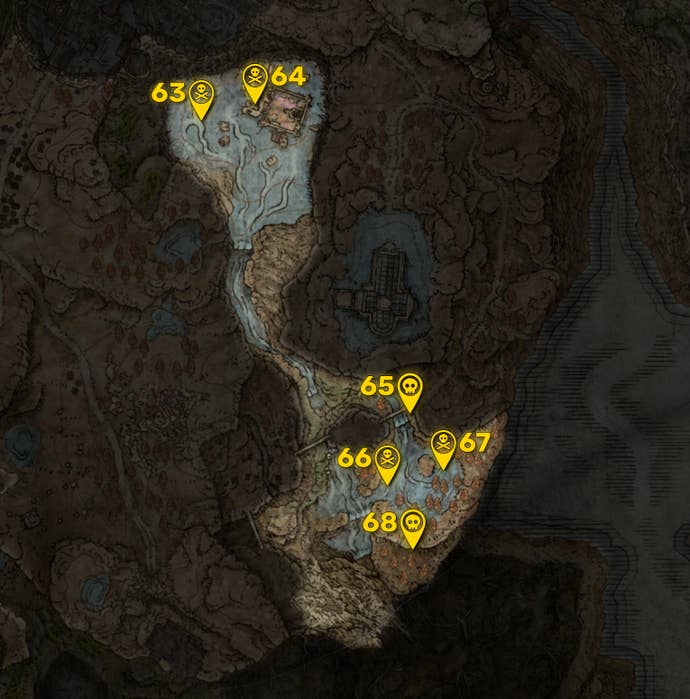
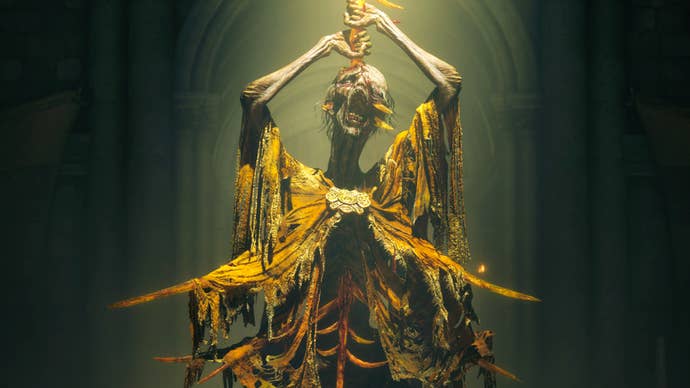
Putrescent Knight
Prepare yourself well, because this is one of the tougher bosses in the Elden Ring DLC.
Sadly, the Putrescent Knight won’t let you appreciate it for long.
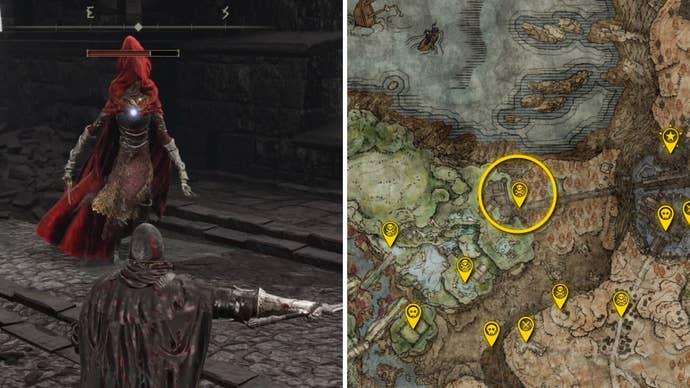
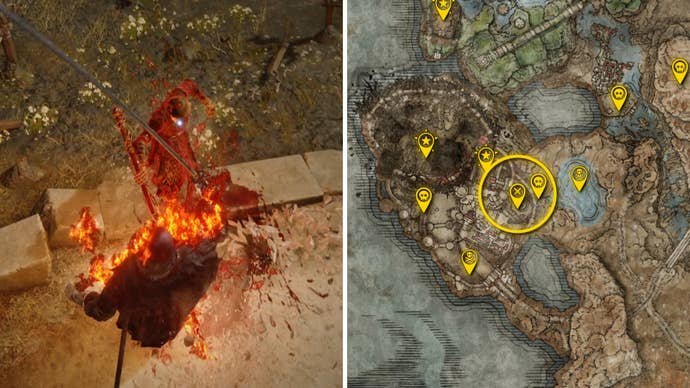
Thiollier
If you’re looking to completeThiollier’s questline, eventually you’re going to have to fight him.
And Thiollier doesn’t like that she’s speaking to you instead of him.
So he invades, and attempts to use his Deadly Poison Perfume Bottle to subdue you.
As he’s remarked to you previously, Thiollier isn’t all that strong.
Tibia Mariner
Tibia Mariners are usually extremely easy, I’ve found.
The Mariner itself is dead easy, so really the true boss is the Revenant.
Fortunately, it has a huge weakness.

Lots of charging around, big swinging attacks, and so on.
They look intimidating, but they’re not actually that difficult, and they can be staggered fairly easily.
Look out for this one in the middle of the lake near the centre of Charo’s Hidden Grave.
Throw a few Hefty Fire Pots in the basket and it’ll go down in no time.
Just see to it you time your throws right!
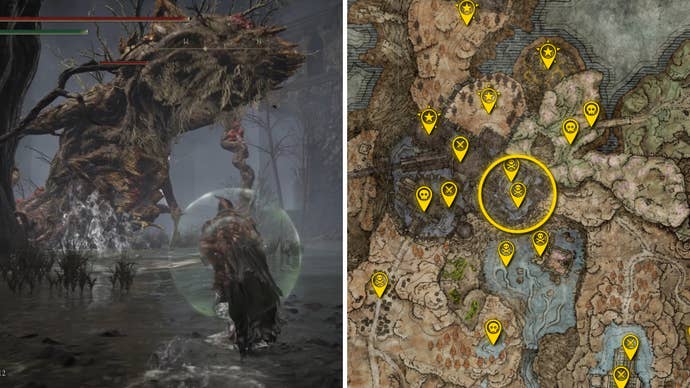
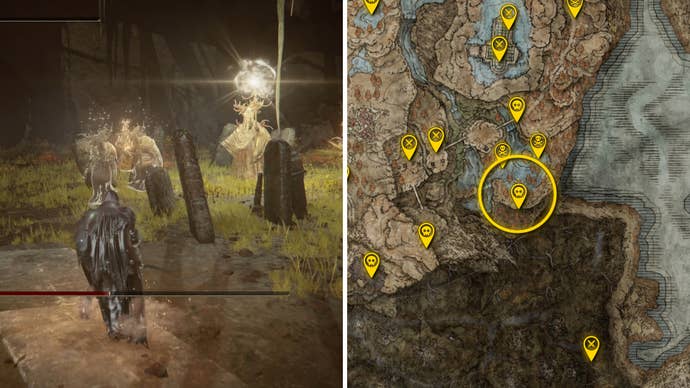
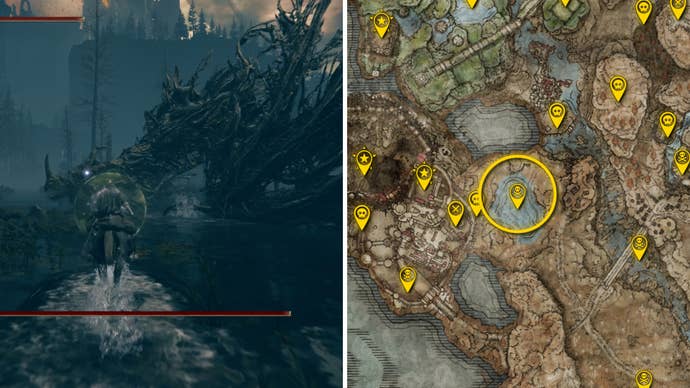
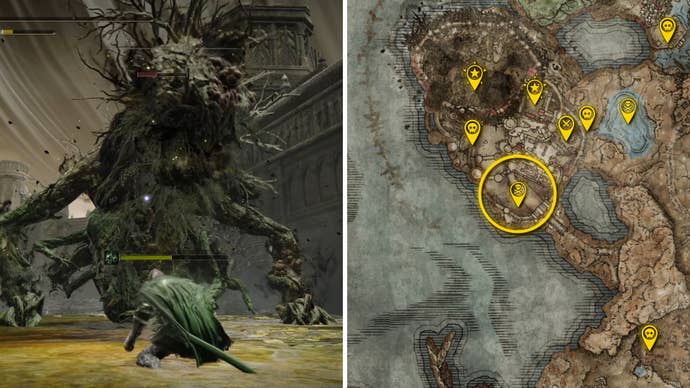
Lamenter
The Lamenter is a very curious foe.

Again, expect a very Ulcerated-Tree-Spirit-esque fight.
Neither foe is particularly challenging, especially with an ally to back you up.
Choose who you prefer (or don’t!

), and enjoy.
And if you want more information, check out our guide onwhether you should assist Leda or the Hornsent.
This is the other one, located slightly northeast of the first.

In terms of the boss fight itself, the two are exactly identical.
The only reason this particular Ulcerated Tree Spirit is special is because it drops anIris Of Occultationon death.
But if you get him in a corner, he’s toast.
And Leda really isn’t too difficult either - she’s basically the same as any other NPC invader.
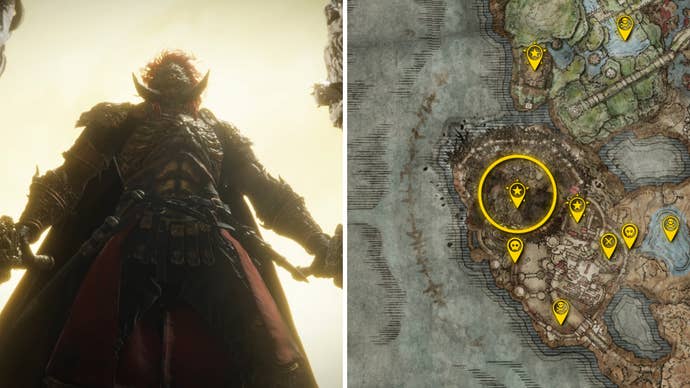
Messmer The Impaler
Ah, here he is.
To no one’s surprise, he’s very tough.

Weirdly though, I found it easier to get to grips with that second phase than with his first.
Stick with it; it might end up taking less time than you think to defeat Messmer.
He ain’t noMalenia.
Hard by ordinary enemy standards, but not by boss standards.
This Remembrance boss has plenty of powerful attacks, and is particularly difficult to face from the side.
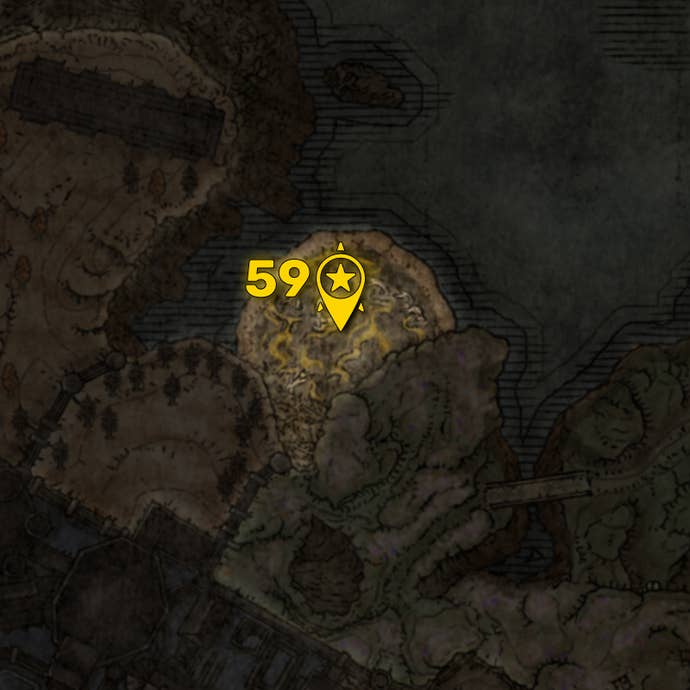
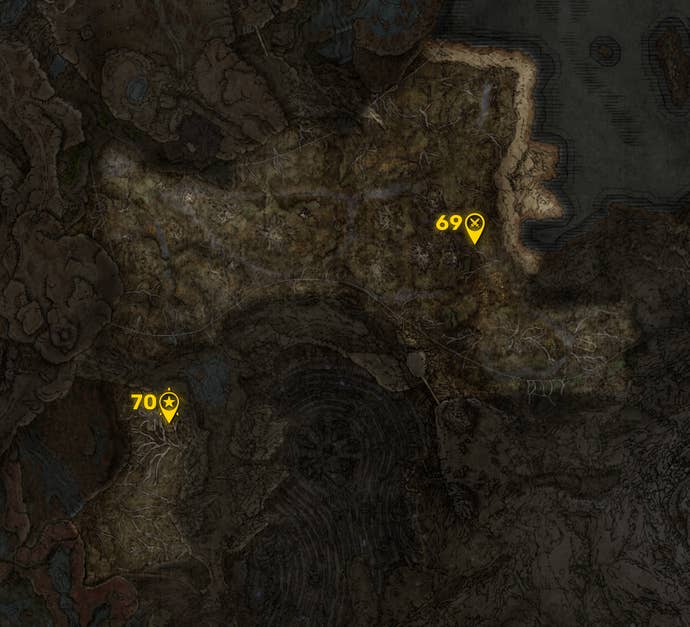
This area is little more than a boss arena housing a single Remembrance Boss: the Scadutree Avatar.

Scadutree Avatar
The Scadutree Avatar is a thrilling boss to fight.
The other really dangerous move is when it throws bleed-inducing roots at you.
Dodge to the side as if your life depends on it, because it probably does.

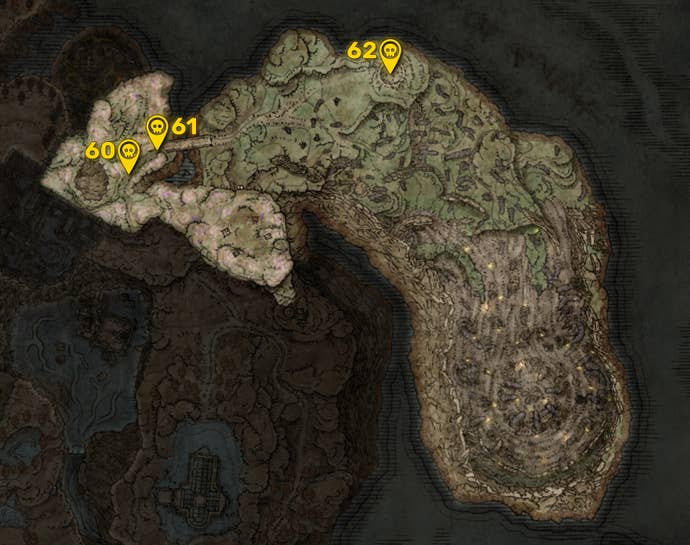
Hinterland boss locations
The Hinterland is a very tricky area to reach.
Tree Sentinel
A short way into the Hinterland (Hinterland?
Furnace Golem #6
You know where those two summon signs were for Leda vs the Hornsent?
Well there’s a ladder right there.
Except this one isn’t broken down.
You know what to do.

After that, of course, you gotta defeat it.
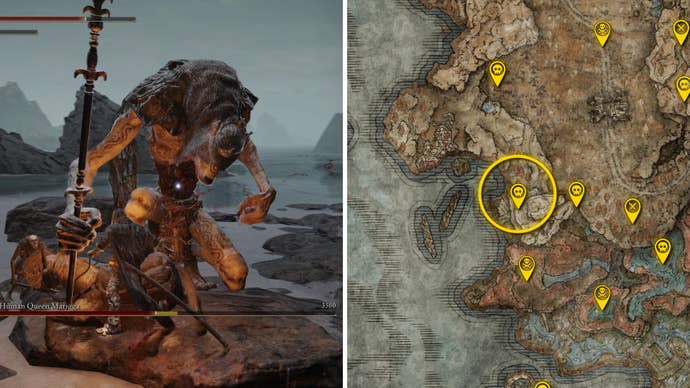
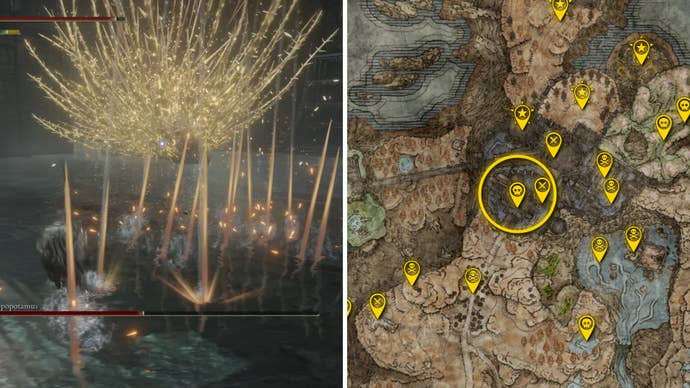
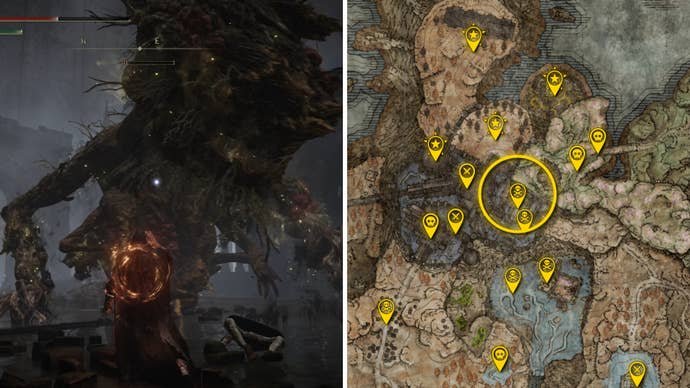
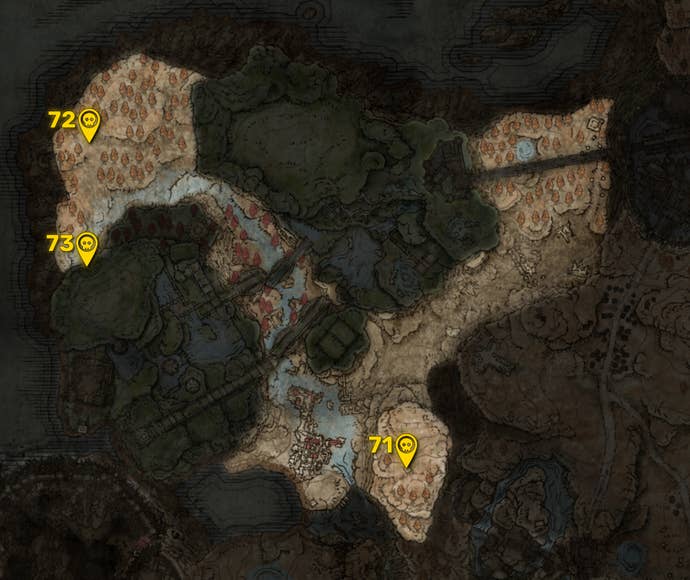
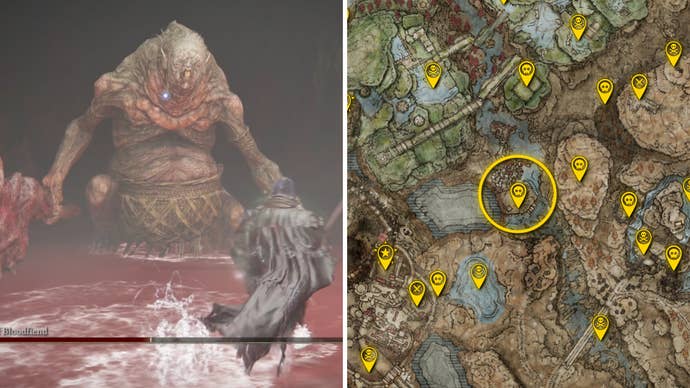
Hippopotamus #3
Yet another Hippopotamus awaits you slightly further into the lake from the first (above).
Otherwise, they’re fairly straightforward fights at this point of the DLC.

Defeating Jori is more of a test of patience than any other dungeon boss.
Otherwise, he’s another very straightforward NPC miniboss.
Slash at him until he bleeds and dies, and beware his Flame Of Frenzy AOE attack.

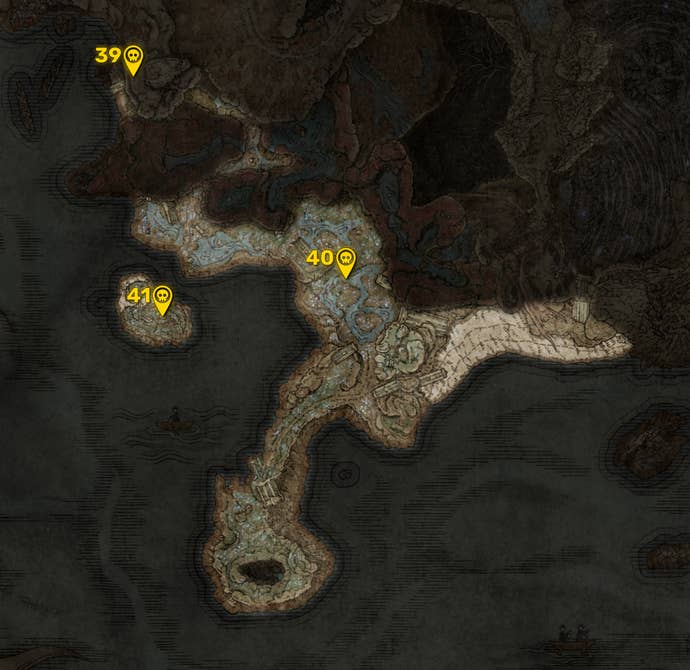
Midra, Lord Of Frenzied Flame
Now here’s an awesome boss.
Midra is the proprietor of Midra’s Manse, the main landmark inside the Abyssal Woods.
This guy is worth the trek through the Abyssal Woods.

Unexpectedly, this boss probably is the one thatfeelsmost like Malenia while fighting him.
I wouldn’t quite put him on her difficulty level, but he’s not far off at all.
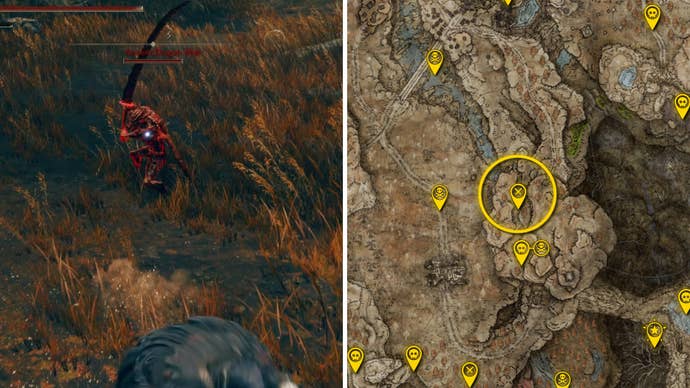
Red Bear
The so-called Red Bear is anything but.

Rugalea is pretty much identical to Ralva from Scadu Altus, albeit slightly tougher due to region scaling.
Stay on the move, as you would while fighting a Crucible Knight.
Devonia is generally just another Crucible Knight.

Slow, powerful attacks, doesn’t give you much time to heal.
She also turns into a centaur, or something.
Regardless, she’s annoying but not a real sticking point.

Send it to Hippo Hell.
Only this one is much more dangerous than the one you faced in Belurat.
Make no mistake, this is a tough fight even when you’re maxed out on Scadutree Blessings.

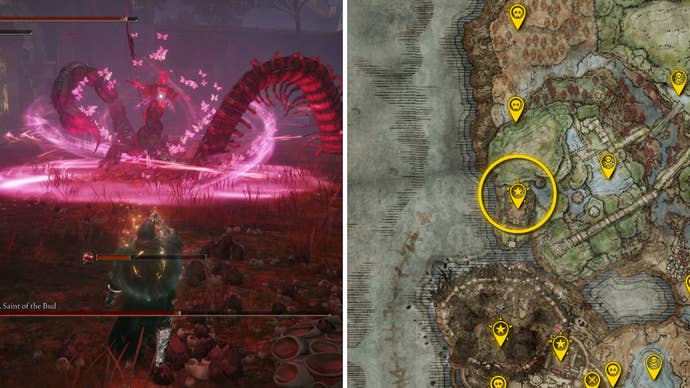
Steer clear of her butterflies and you’ll be fine.
The first one you’ll find is just up the stairs beyond the garden near the beginning of Enir-Ilim.
It’s a powerful foe with Lightning-imbued attacks that can fill the area with damage-dealing lightning bolts.
Leda, Dryleaf Dane, and Allies
What an absolute bastard of a fight this can be.
Even then, this final boss is going to give you a very hard time.
Congratulations if and when you manage to defeat him!

Yep, we really do have a guide for everything here.